Daniel Ciocîrlan
4 min read •

Share on:
AWS Lambda needs little introduction. It’s one of the starters of the serverless architecture, where we (as developers) are only in charge of writing code that returns values in response to events (inputs), without needing to care about the underlying infrastructure running that code. Naturally, this architecture has become very popular in recent years. It also matches the functional programming mindset very closely.
In this tutorial, I’m going to show you how you can run a Scala function on AWS in a few minutes, step-by-step.
Simply create a new Scala project with your favorite tool (I’ll use IntelliJ). Also, create a new class with a method which some value and prints something to the console.
package demolambda

class DemoLambda {

  def execute(): Int = {
    println("I'm running!")
    42
  }
}
After you’ve written the magical code, you’ll need to package your application with your favorite build tool. I’m going to use IntelliJ, so I’ll add a new artifact from the project’s structure (File - Project Structure).

Then make sure you add the right module and that the dependencies are included in the final jar (check the small radio button below):
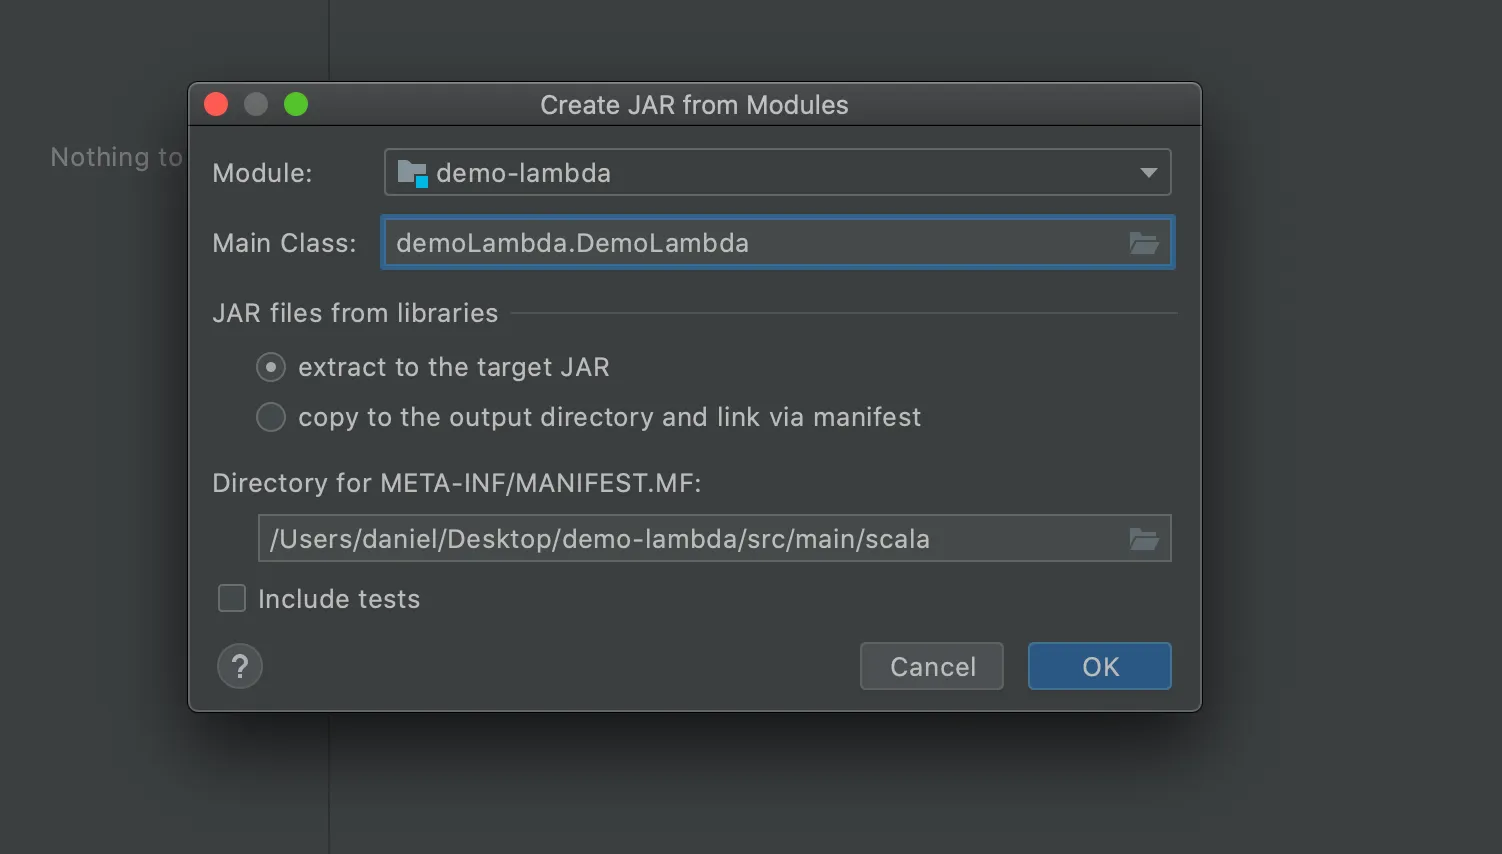
After you’ve created the artifact definition, you’ll need to build it. Go to Build -> Build artifacts, select your new artifact, then Build. The compiler will take care to create your new JAR file.
The JAR file will be under the out/ folder in your IntelliJ project. Remmeber that path, because you’ll need to upload it to AWS. As a sanity check, look at the JAR’s size: it should be a few MB.
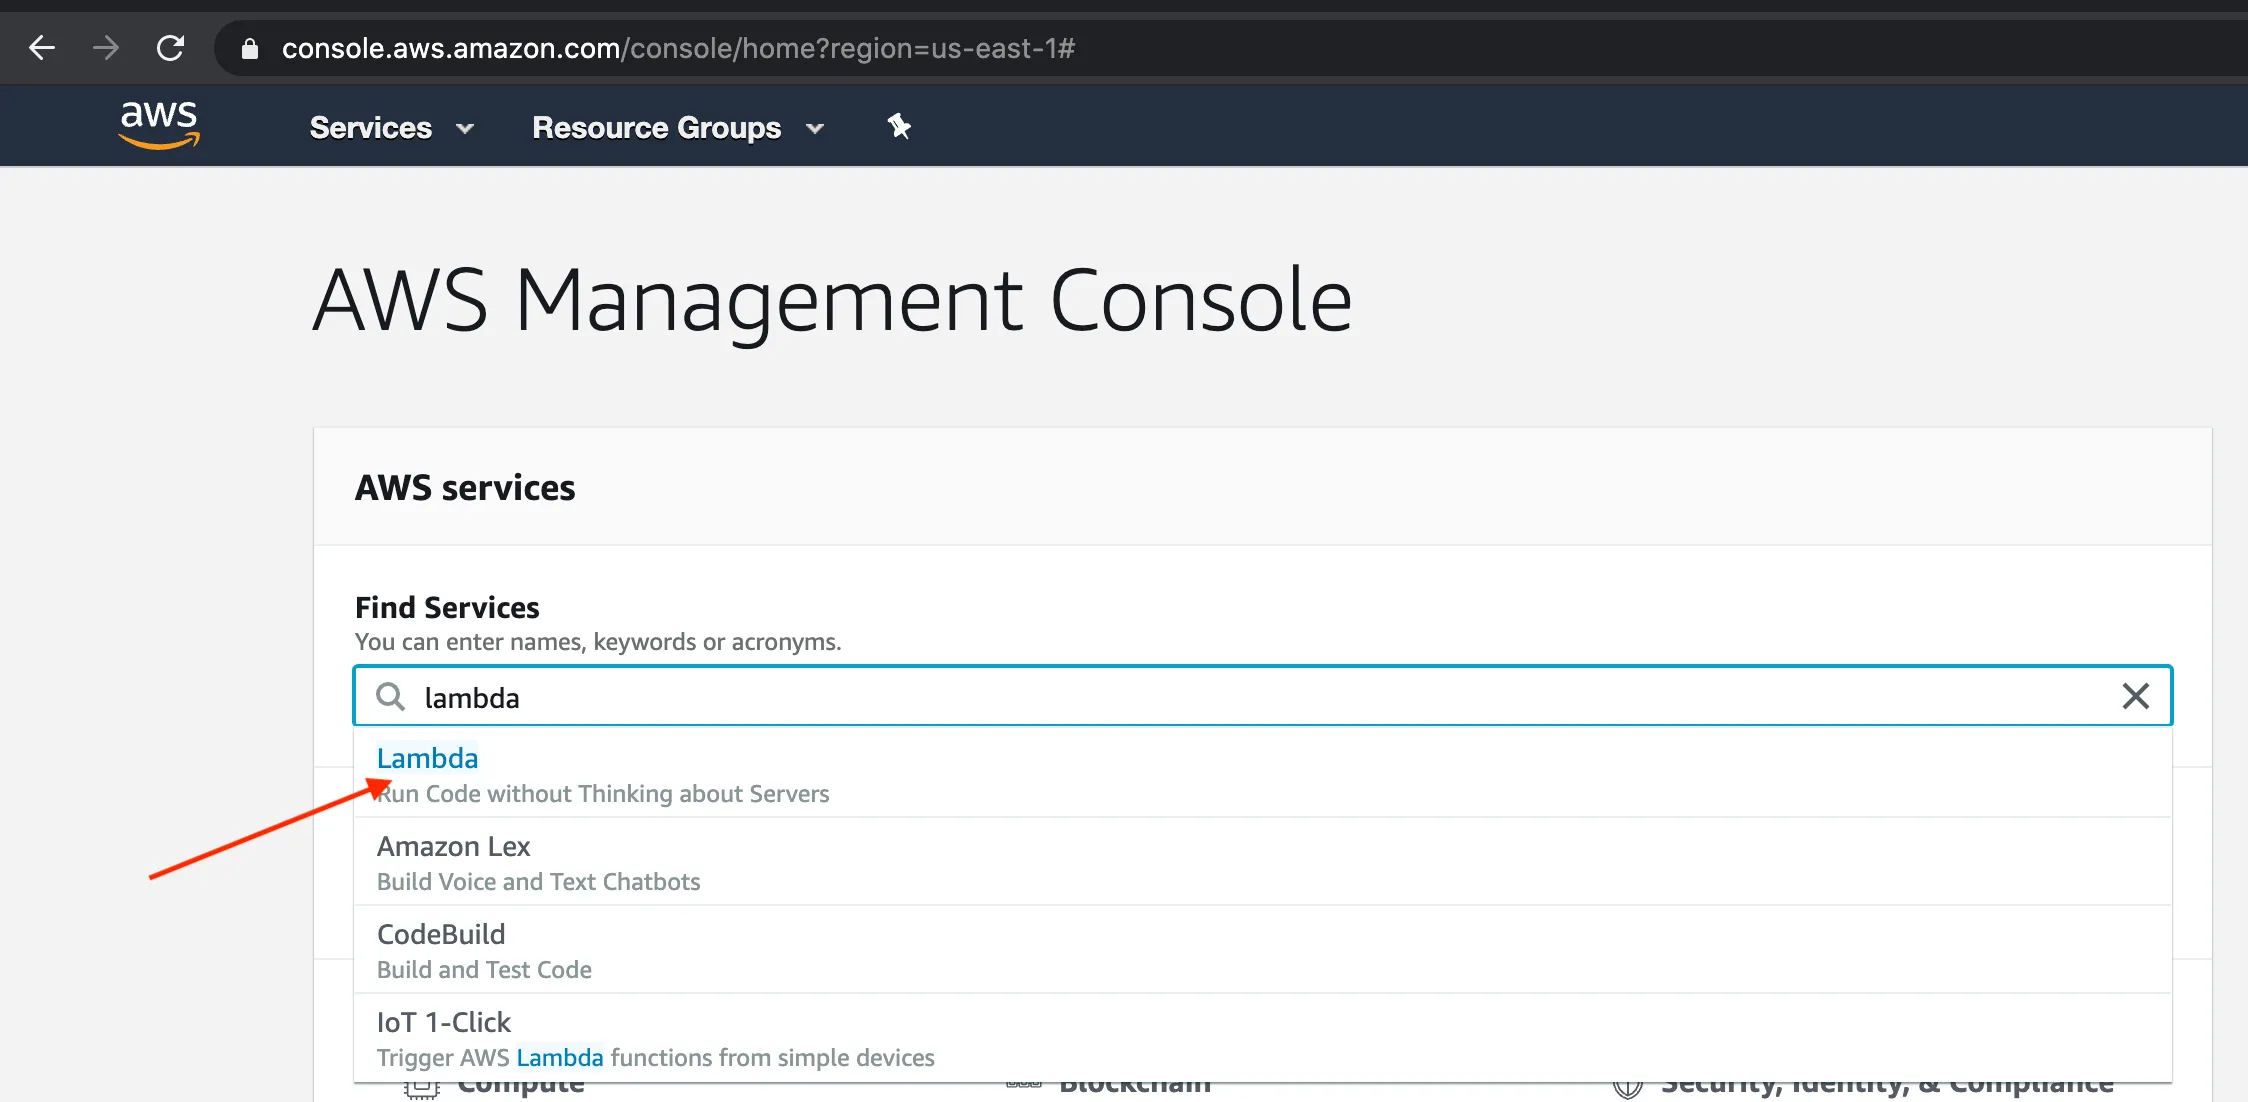
Now for the fun stuff. Go to your AWS console. If you don’t have an AWS account, go ahead and create one. Then select the Lambda function from the 572389057823 services Amazon offers you.
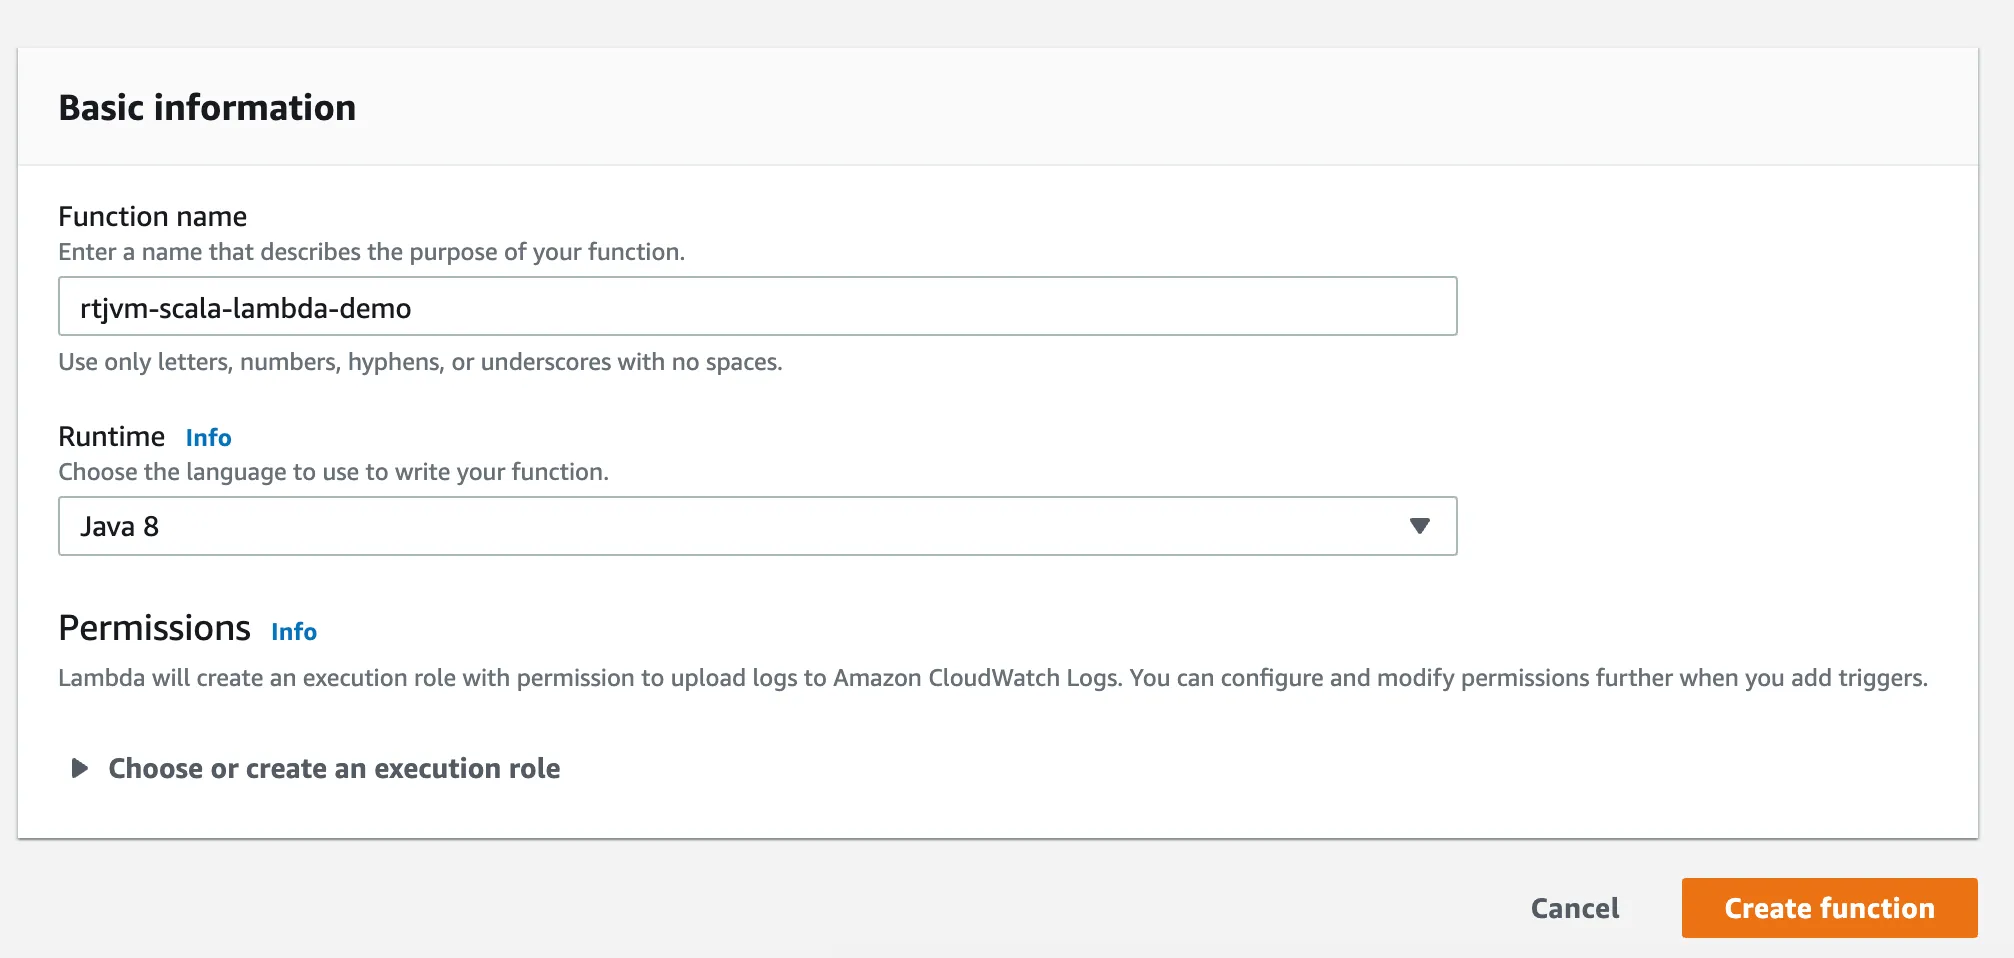
Then, go ahead and create a new Function and select Java 8 or 11 as their runtime. Both will work fine for this demo.

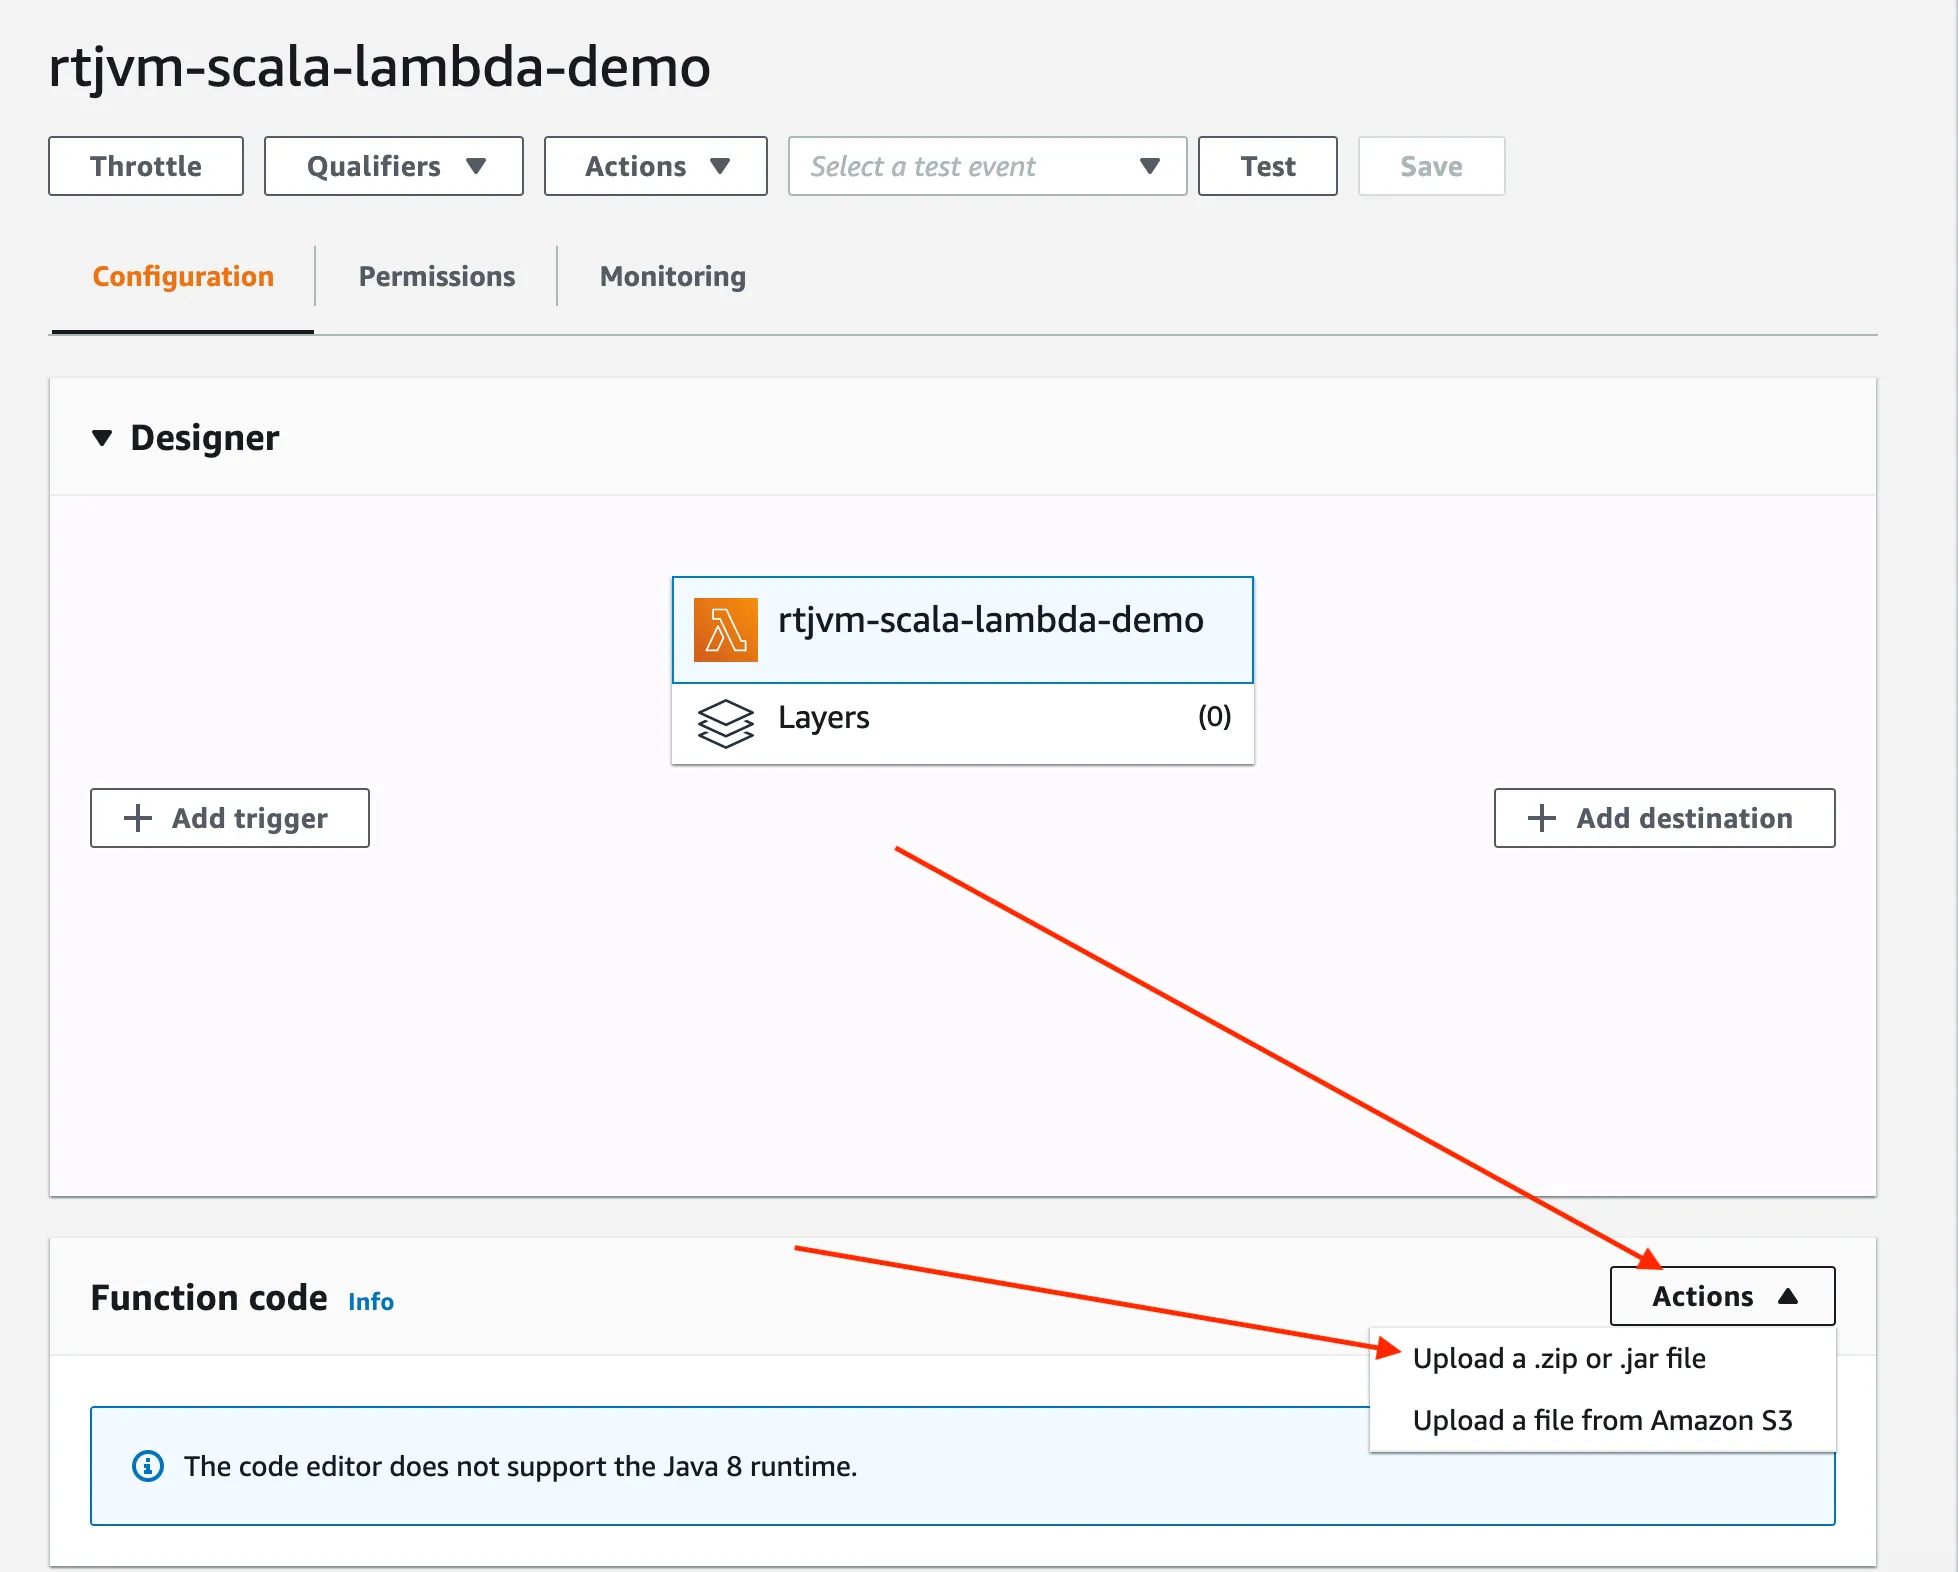
After that, you’ll arrive at your Function’s dashboard and configuration. Go ahead and upload the JAR you’ve built a minute ago:
After that, you need to go down to the Basic Settings panel and Edit the lambda’s entry point:
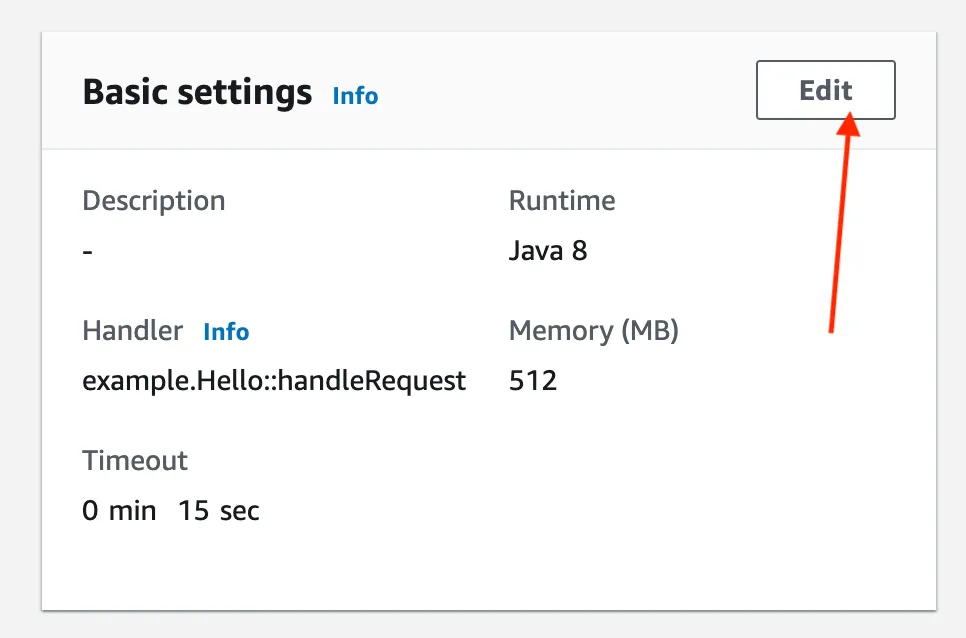
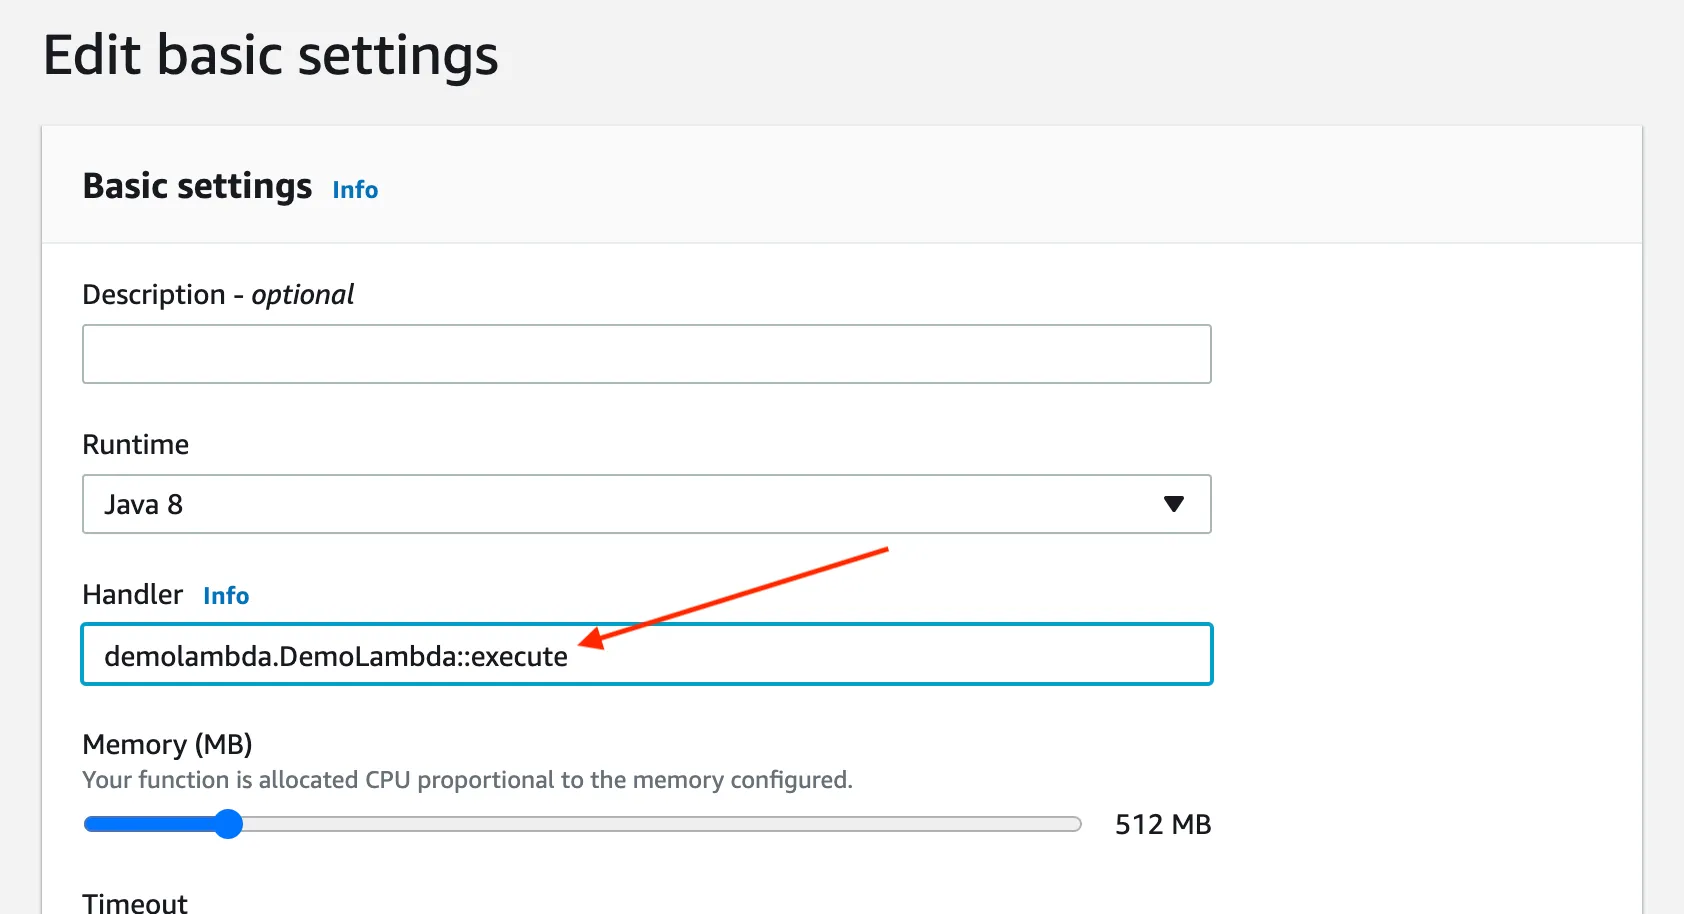
Make sure you use the fully qualified class name of your Scala class, then use the Java notation to identify the method you want to run. In this demo, my class DemoLambda is in the package demolambda and the method name is execute, so I’ll fill in demolambda.DemoLambda::execute.
After you’ve done that, you’ll need to set up a test run. Click the Test button at the top.

You’ll get a dialog with a standard test event as JSON. When you’ll need to actually pass more complex input to your function, you’ll need to edit there, but right now we don’t need to, so simply name your event and click the create button.
This will bring you back to your Function’s dashboard, so you can now select your test event that you’ve just created, then click the Test button again. After a few seconds, you’ll see a green box with the successful test run. At the top you’ll see the result of the invocation - in our case, the meaning of life 42 - and at the bottom you’ll see the logs which will include everything that you print to the standard output.
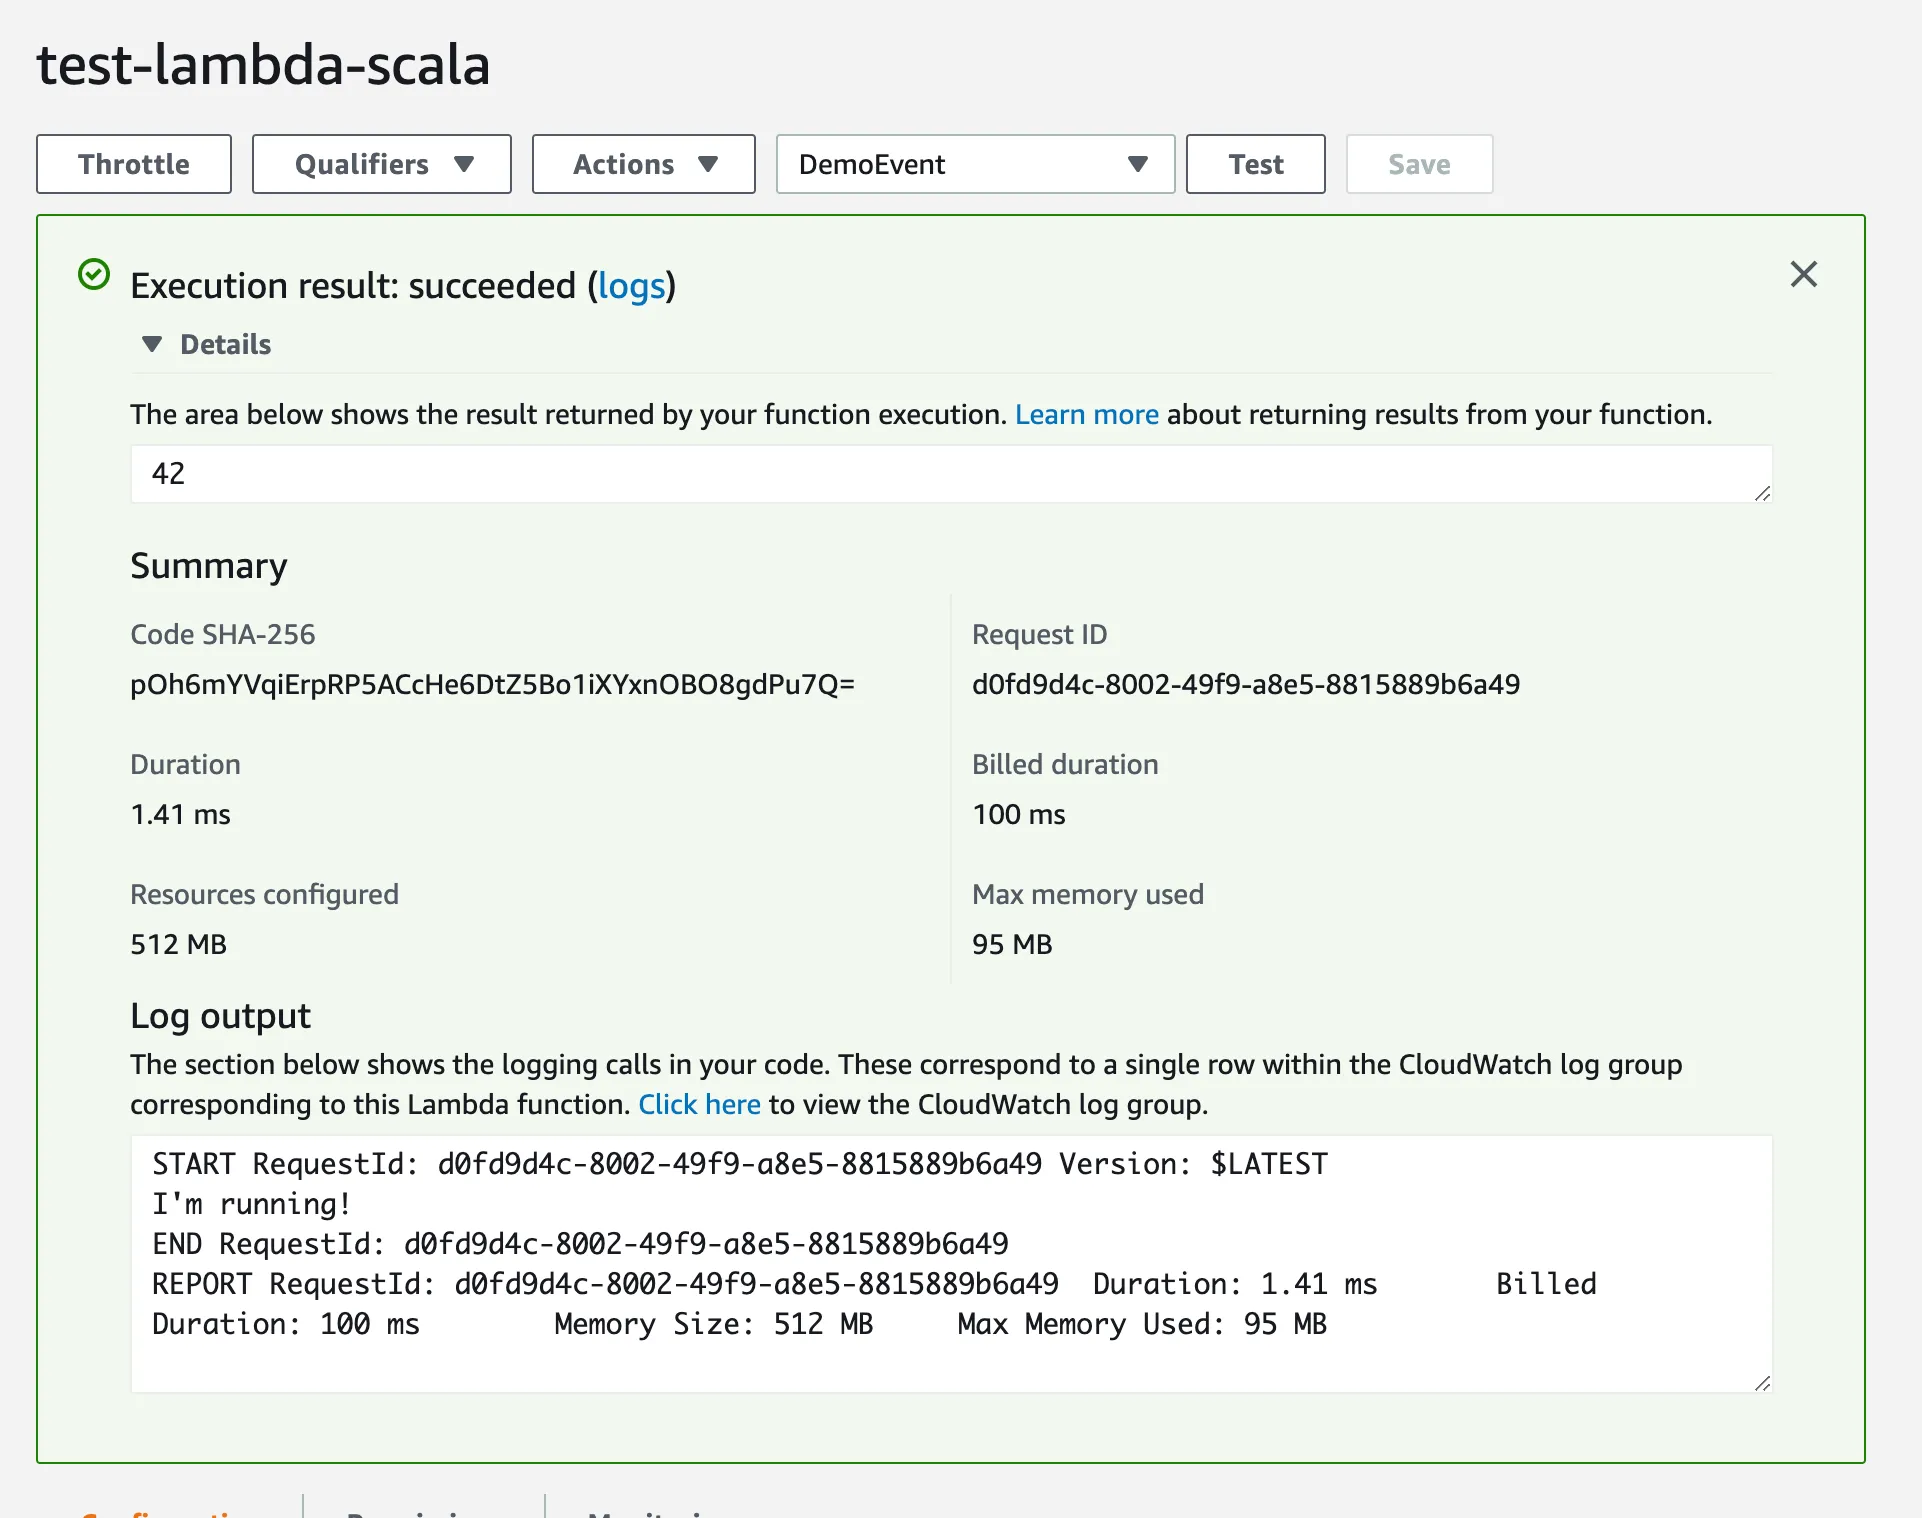
If you see a red box instead of a green one, some common mistakes are there’s either something misconfigured - e.g. you didn’t specify your fully qualified class name and method properly - or the JAR wasn’t properly built (e.g. it doesn’t contain the Scala runtime libraries).
You’ve learned how to deploy a Scala application to AWS Lambda. Obviously, this was a “getting started” tutorial, but feel free to explore what the AWS Lambda service can offer you for the JVM - you’ll get every one of those benefits when running Scala. For AWS Lambda documentation with Java (including how to handle inputs) check this link and the docs around it:
Share on: